Russian Shuba Salad: Authentic Herring Under a Fur Coat Recipe
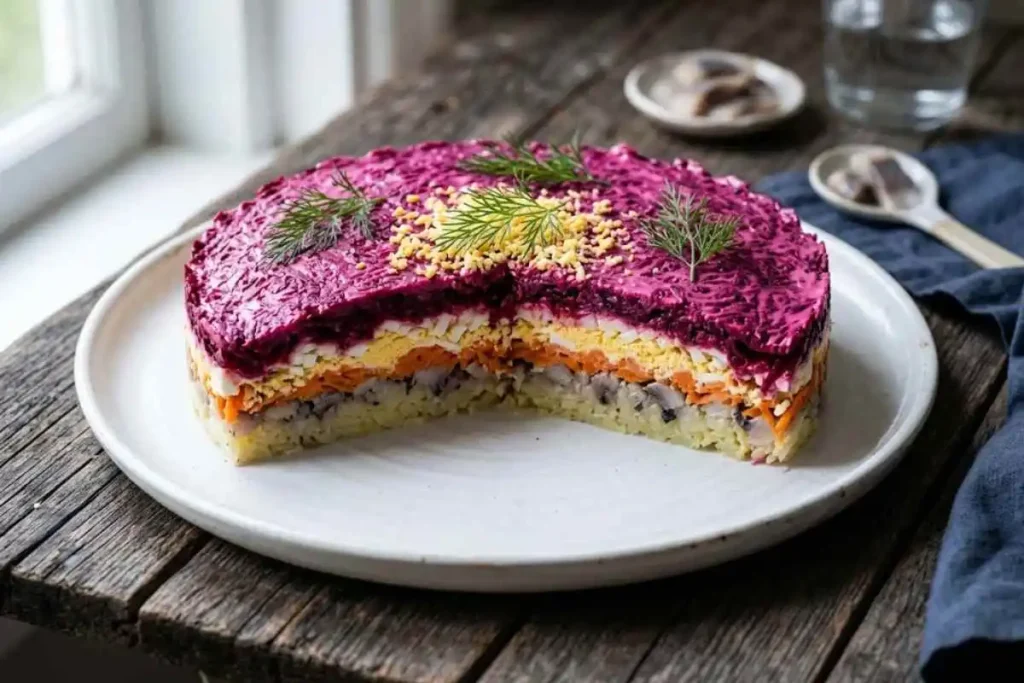
The first time I made this Russian Shuba Salad at home, I called my neighbor – a Ukrainian grandmother who has been making it for fifty years – and made her walk me through every single layer. She laughed at my nervousness. “It’s just beets and fish,” she said. But we both know it’s so much more than that.
This iconic Russian layered salad – known in Russian as “Selodka pod shuboy” (Селёдка под шубой), which literally means herring under a fur coat – is the centerpiece of every New Year’s table and holiday spread across Russia, Ukraine, and Eastern Europe. The “fur coat” is those gorgeous layers of potatoes, carrots, and the stunning deep-purple beet on top, all held together with creamy mayonnaise.
If you’ve never tried it, here’s what I promise you: it looks fancy and tastes incredible. And once you see how the layers come together, you’ll make it every single time you have guests.
Recipe Highlights
| Prep Time | 30 minutes |
| Cook Time | 50–60 minutes |
| Chill Time | 8 hours (overnight recommended) |
| Total Time | ~9–10 hours (mostly hands-off) |
| Servings | 8–10 |
| Difficulty | Easy |
| Calories | ~280 per serving |
| Cuisine | Russian / Eastern European |
| Course | Salad, Side Dish, Holiday Appetizer |
Why You’ll Love This Recipe
- Show-stopping presentation – That magenta beet top layer looks like it came from a restaurant. Nobody needs to know it took you 30 minutes of active work.
- Make-ahead friendly – It actually tastes BETTER after chilling overnight. Perfect for holiday prep.
- Surprisingly affordable – Beets, potatoes, carrots, and eggs are pantry heroes. Herring is the only specialty item.
- Deeply satisfying – Creamy, savory, earthy, and rich. Every layer adds something.
- Authentic Russian holiday salad – This is the real deal, the version that’s been on family tables for generations.
Ingredient Notes & Substitutions
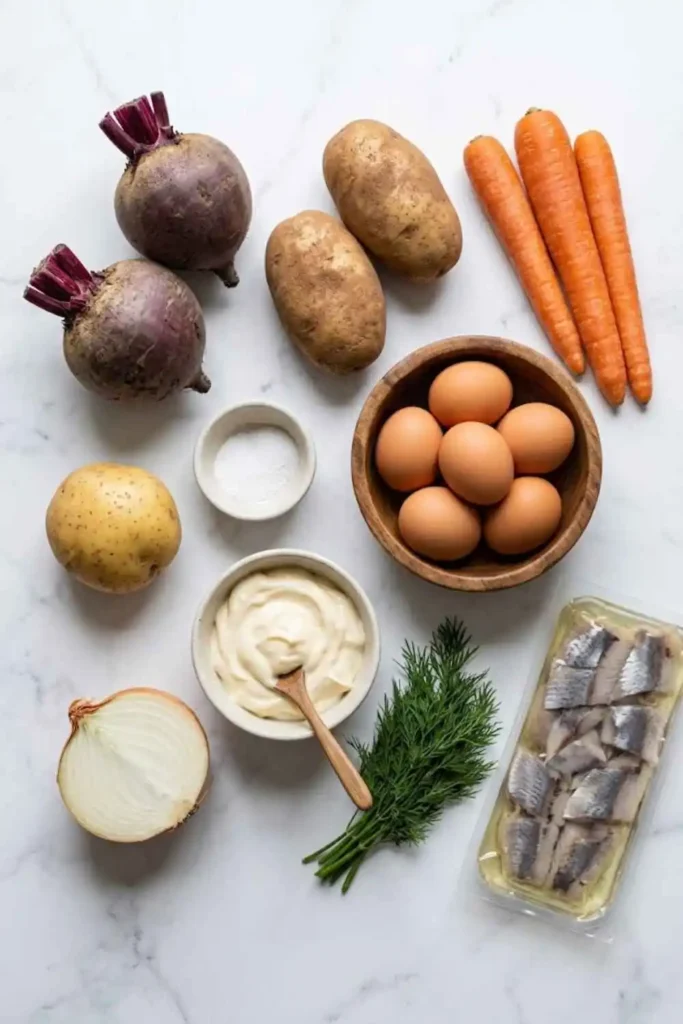
Herring in oil – This is the star. Look for herring fillets packed in oil (not vinegar or wine) at a Russian/Eastern European deli, Costco, or the international aisle at larger grocery stores. Brands like “Russkiy Standart” or Matjes herring work great. The oil-packed version is milder and less sharp than the brined type.
Can’t find herring? Use smoked salmon instead. It gives a slightly different flavor but works beautifully – the layers and creaminess still shine through.
Beets – Fresh purple/red beets are non-negotiable for that classic magenta top layer. Pre-cooked packaged beets (like Love Beets) can save time – just pat them dry before grating.
Mayonnaise – Full-fat real mayo is the traditional choice. Russian cooks use Hellmann’s, Kraft, or the Russian brand “Ryaba.” Light mayo works, but the layers won’t hold as firmly. Avoid Miracle Whip – it’s too sweet.
Potatoes – Russet or Yukon Gold both work. Yukon Golds hold their shape better after grating. Avoid waxy red potatoes – they get gummy.
Eggs – You’ll separate yolks from whites after hard-boiling. Both get grated separately for distinct layers and that beautiful textural finish.
Onion – Half a yellow onion mixed into the herring adds a sharp, savory punch. If raw onion is too strong for you, soak the diced onion in cold water for 10 minutes first, then drain. It tones down the bite without losing flavor.
Step-by-Step Instructions
Step 1: Cook the Beets First
Fill a medium pot halfway with water. Add the whole, unpeeled beets, cover, and bring to a boil. Reduce heat to medium-low and cook for 40–50 minutes, until a knife slides in and out easily. Add more water as needed – beets absorb a lot. Set aside to cool completely.
Step 2: Cook Potatoes, Carrots & Eggs Together
Fill a second pot halfway with water. Add the potatoes and cook for 15 minutes. Add the carrots and cook another 10 minutes. Carefully lower in the eggs with tongs and cook everything together for a final 15 minutes. Drain and let everything cool to room temperature. Don’t rush this – warm ingredients will melt the mayo layers.
Step 3: Prep the Herring Mixture
Remove herring from the package and lay it on a paper towel-lined plate. Pat firmly with more paper towels to remove excess oil – this step keeps your layers from getting greasy. Finely dice the herring and the half onion, then mix them together in a small bowl. Refrigerate until ready to assemble.
Step 4: Peel & Grate Everything
Once cooled, peel the beets, potatoes, carrots, and eggs. Separate egg yolks from whites carefully.
- Beets and potatoes – Use the large holes of a box grater
- Carrots, egg yolks, egg whites – Use the fine holes of the box grater
Keep each ingredient separate in its own bowl. This is your mise en place moment.
Step 5: Assemble the Layers
Use a large, shallow serving dish or a 9×13 dish. Here are the layers from bottom to top:
- Grated potatoes – Spread evenly, press gently to compact
- Herring and onion mixture – Spread evenly over potatoes
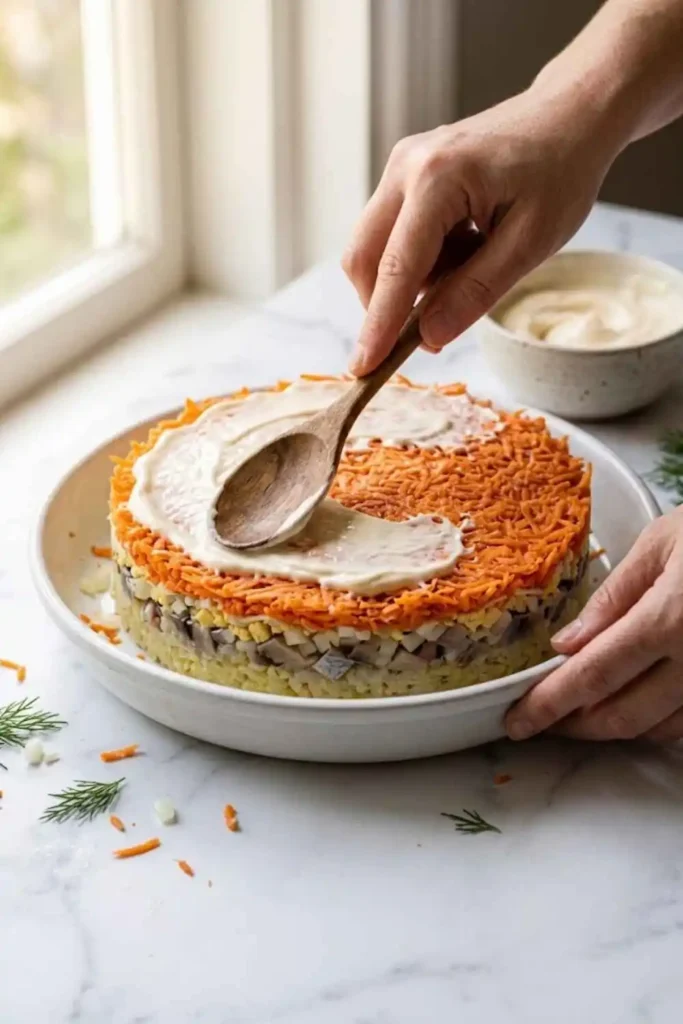
- Mayo layer – 3 tablespoons, spread as evenly as possible with the back of a spoon
- Grated carrots – Spread evenly, then 3 tablespoons mayo
- Grated egg yolks – Spread over carrots, then 3 tablespoons mayo
- Grated egg whites – Spread evenly, then 3 tablespoons mayo
- Grated beets – This is your “fur coat” top layer, spread to cover everything fully, then 3 tablespoons mayo spread across the beet surface
Total mayo used: approximately 3/4 cup. Don’t worry if layers shift slightly as you spread – it will all set up during chilling.
Step 6: Chill Overnight
Cover tightly with plastic wrap and refrigerate for at least 8 hours, preferably overnight. This rest time is essential – the layers absorb the mayo, the flavors meld, and the salad firms up so it slices cleanly.
Garnish with fresh dill or parsley sprigs just before serving.
Recipe Tips & Tricks
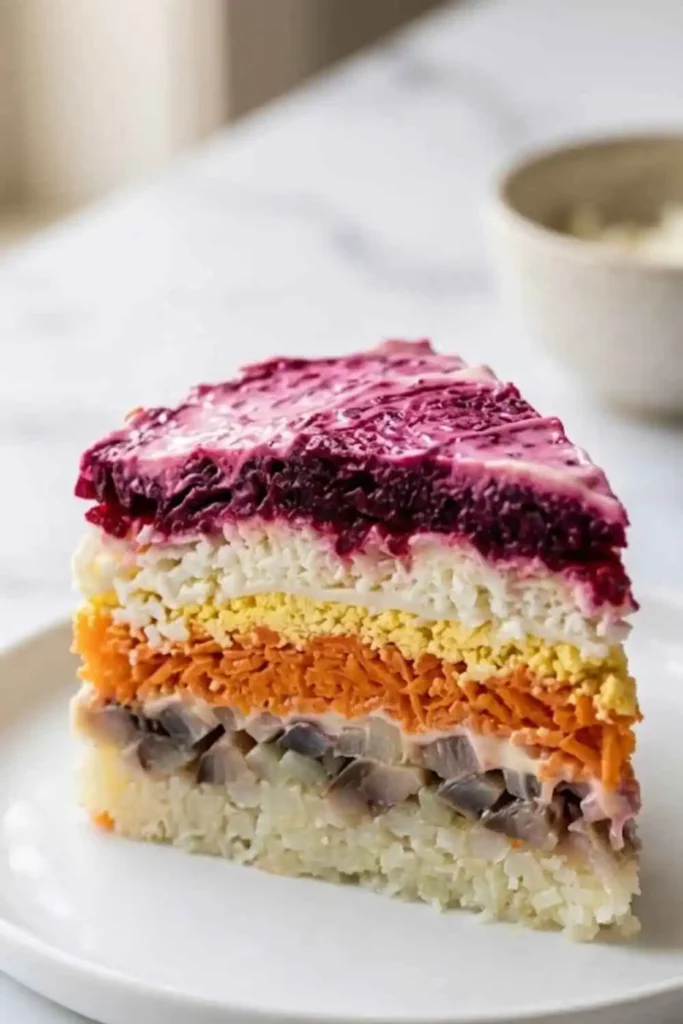
Spread mayo carefully. The egg yolk layer especially likes to blend with the carrot layer beneath it. Use the back of a spoon and work slowly with light pressure. A small offset spatula is your best friend here.
Cool everything fully before assembling. Warm beets will bleed into every layer. Warm potatoes make the whole base mushy. Give yourself time.
Make it a day ahead. This salad is genuinely better on Day 2. The layers set, the herring mellows, and the beet color deepens beautifully. It keeps well in the fridge for up to 3 days.
Storing leftovers: Cover tightly and refrigerate. Do not freeze – the mayo-based layers break down and become watery when thawed.
Serving tip: For a cleaner presentation, use a round springform pan as your mold. Layer inside it, chill overnight, then release the sides for a perfect cylinder. Fancy enough for any holiday table.
Common mistakes to avoid:
- Using vinegar-packed herring (too sharp and acidic)
- Skipping the chill time (layers won’t hold and flavors won’t meld)
- Grating everything on the same side of the grater (texture contrast is important)
- Adding too much mayo (the salad becomes sloppy and heavy)
Variations & Add-Ons
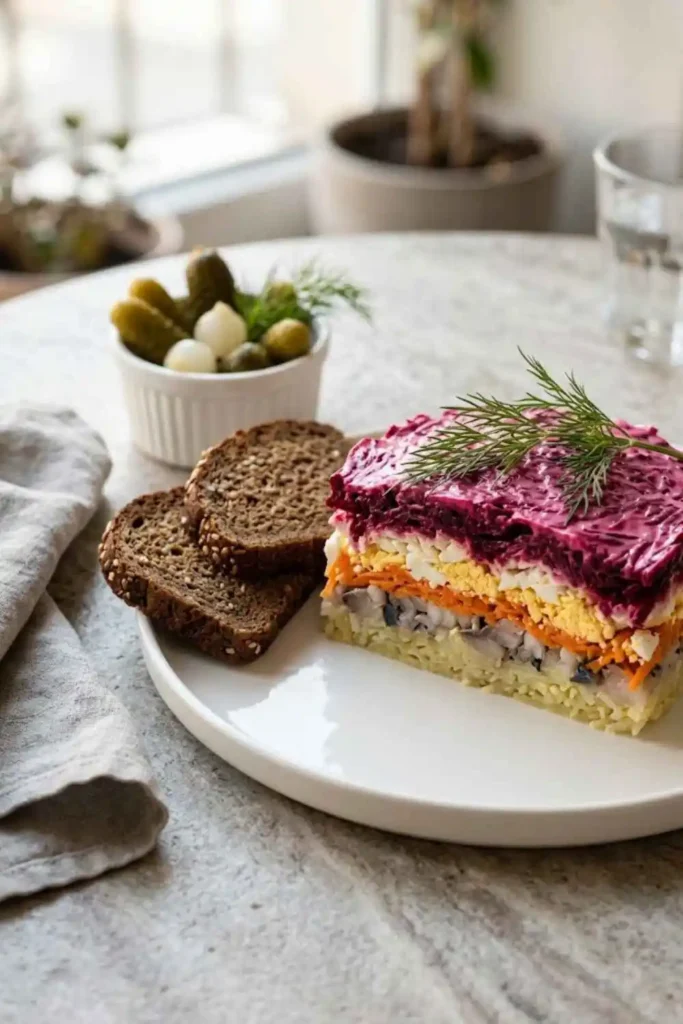
Smoked salmon version: Swap herring for cold-smoked salmon. Dice it just as you would the herring. The flavor is milder and more approachable for guests who aren’t herring fans.
Add a pickle layer: Some Russian families add a layer of finely diced dill pickles (cornichons) between the herring and carrots. It adds a lovely briny crunch.
Use beet mayo on top: Mix 2 tablespoons of mayo with 1 tablespoon of grated beet juice for a naturally tinted pink mayo spread. It looks gorgeous and keeps the beet from bleeding down.
Individual servings: Use small ring molds or even clean tuna cans (both ends removed) to build individual portion towers. Elegant for dinner parties.
Lighter version: Use Greek yogurt in place of half the mayonnaise. The flavor is tangier but still delicious.
What Can Go Wrong (Troubleshooting)
My layers are all mixing together. This usually means your ingredients weren’t cooled long enough, or you spread the mayo too aggressively. Let everything reach room temperature (or even fridge-cold) before assembling.
The beet is bleeding into the layer below. Add a slightly thicker mayo layer between the egg whites and the beets. The mayo acts as a barrier.
The salad is too wet. You may have used too much mayo, or the herring wasn’t patted dry thoroughly enough. Always blot the herring well and stick to the 3-tablespoon mayo rule per layer.
The herring tastes too strong. Pat it extra dry, and soak the diced onion in cold water for 10 minutes before mixing. Both steps reduce the sharpness significantly.
FAQ
Can I make Shuba Salad ahead of time?
Yes – and you should! Shuba Salad is best made the day before serving. It needs at least 8 hours in the refrigerator for the layers to set and flavors to meld properly.
Where can I find herring in oil?
Check Russian/Eastern European delis, the international foods aisle at larger supermarkets, Costco (they often carry it), or order online. Look for “herring fillets in oil” – not brined or pickled herring.
Can I freeze Russian Shuba Salad?
No. The mayonnaise-based layers separate when frozen and become watery upon thawing. Make it fresh and keep refrigerated up to 3 days.
What does Shuba mean in Russian?
Shuba (шуба) means “fur coat” in Russian. The layers of colorful grated vegetables covering the herring resemble a fur coat – which is where this beloved salad gets its poetic name.
Can I use canned tuna instead of herring?
You can, though it will change the flavor profile significantly. Canned tuna in oil (not water) is the closest substitute. Drain well and flake finely. The result is milder but still delicious.
How long does Shuba Salad last in the fridge?
Up to 3 days covered tightly. It’s freshest on Day 2. After Day 3 the beet starts to bleed more heavily into the surrounding layers.
Is this recipe gluten-free?
Yes! All the ingredients in traditional Shuba Salad are naturally gluten-free. Just double-check your mayonnaise label to confirm.
What to Serve With Russian Shuba Salad
This Eastern European beet and herring salad is a rich, hearty side dish. It pairs best with:
- Dark rye bread or black bread – Traditional and perfect for scooping
- Borodinsky bread – Russian-style caraway rye, a classic pairing
- Sour cream – A small dollop on the side balances the richness
- Pickled cucumbers or cornichons – The brine cuts through the creamy layers
- A simple green salad – Something light and fresh to contrast
For a full Russian holiday spread, serve alongside our Tzatziki Sauce Recipe – Thick, Creamy & Easy or our Warm German Potato Salad with Smoky Bacon Vinaigrette.
Conclusion
Russian Shuba Salad is one of those dishes that earns its place on the table through both beauty and flavor. The magenta beet top, the creamy layers, the savory herring tucked inside – it’s genuinely stunning and genuinely delicious. Once you make it, I promise it will become your go-to for every holiday and potluck where you want to bring something truly memorable.
Give yourself a day ahead, follow the layer order carefully, and don’t skip the chill time. I can’t wait for you to try this! Drop a comment below and let me know how it turned out – or tag us on Pinterest so we can see your beautiful Shuba!
Save this recipe for your next holiday gathering!
You May Also Like
- Tzatziki Sauce Recipe – Thick, Creamy & Easy
- Warm German Potato Salad with Smoky Bacon Vinaigrette (No Mayo!)
- Easy Japanese Cucumber Salad (Sunomono) with Wakame
- 18 Cucumber Salad Recipes (Fresh & Easy!)
- Classic Cranberry Gelatin Salad (Grandma’s Secret Recipe!)
RECIPE CARD

Russian Shuba Salad (Authentic Herring Under a Fur Coat)
Course: Salads, SidesCuisine: Russian, Eastern EuropeanDifficulty: Easy8
servings30
minutes40
minutes280
kcal8
Hours1
hour10
minutesThis authentic Russian Shuba Salad layers herring, potatoes, carrots, eggs, and beets under a creamy mayo “fur coat” for a stunning holiday dish that gets better overnight.
Ingredients
2 medium purple beets, leafy tops removed
2 medium russet or Yukon Gold potatoes
3 medium carrots
6 large eggs
12–16 oz herring fillets in oil (about 1 pound)
1/2 medium yellow onion
3/4 cup full-fat mayonnaise
Fresh dill or parsley for garnish
Directions
- Cook the beets:Fill a medium pot halfway with water. Add whole unpeeled beets, cover, bring to a boil. Reduce to medium-low and cook 40–50 minutes until a knife pierces easily. Add water as needed. Remove and cool completely.
- Cook potatoes, carrots & eggs: Fill a second pot halfway with water. Add potatoes, bring to boil, cook 15 minutes. Add carrots, cook 10 more minutes. Carefully add eggs with tongs, cook a final 15 minutes. Drain and cool to room temperature.
- Prep the herring: Remove herring from packaging, place on paper towel-lined plate. Pat dry with paper towels to remove oil. Finely dice herring and onion. Mix together in a small bowl. Refrigerate until needed.
- Peel and grate: Peel cooled beets, potatoes, carrots, and eggs. Separate egg yolks from whites. Grate beets and potatoes on the large side of a box grater. Grate carrots, egg yolks, and egg whites on the fine side. Keep each ingredient separate.
Assemble the layers:On a large shallow serving dish, layer in this order:
Layer 1: Grated potatoes (spread evenly)
Layer 2: Herring and onion mixture (spread evenly)
Layer 3: 3 tbsp mayo (spread carefully)
Layer 4: Grated carrots + 3 tbsp mayo
Layer 5: Grated egg yolks + 3 tbsp mayo
Layer 6: Grated egg whites + 3 tbsp mayo
Layer 7: Grated beets + 3 tbsp mayo on top - Chill: Cover tightly with plastic wrap. Refrigerate at least 8 hours or overnight. Garnish with dill or parsley before serving.
Notes
- Oil-packed herring is essential – do not use vinegar or wine-brined herring
Smoked salmon is the best substitute for herring haters
The salad keeps refrigerated up to 3 days; tastes best on Day 2
Do not freeze – mayo layers separate when thawed
For clean slices, use a springform pan as a mold